- Production - Materials - Metrology
- Test equipment - Metrology
- Ultrasonic inspection machine
- Evident - Olympus Scientific Solutions
Ultrasonic inspection system FSWautomaticsurface

Add to favorites
Compare this product
Characteristics
- Technology
- ultrasonic
- Other characteristics
- automatic
- Applications
- surface
Description
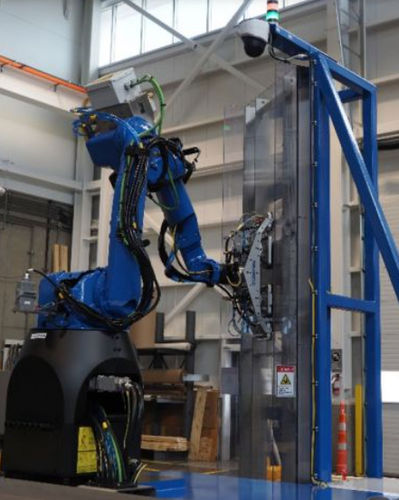
In the past decade, there has been a significant increase in rocket launches. Fuel tanks used to propel rockets into space are built from large cylindrical components that are welded together using friction stir welding (FSW). FSW is a solid-state joining process that uses a rotating cylindrical tool to heat and mix two pieces of light metal in the jointed area. To prevent safety issues, the weld needs to be inspected in multiple directions for a variety of flaws, including lack of penetration, kissing bonds, wormholes, voids, and root and toe defects.
Olympus has developed a unique robotic inspection system to inspect friction stir welds.
Types of Defects in FSW
FSW has multiple advantages over traditional welding methods; FSW avoids the defect types that tend to arise with liquid phase cooling in other welding methods. Additional defect types occur mostly as a result of insufficient temperatures or welding conditions; these defects must be correctly identified and sized.
Natural Defects
Different types of defects can occur in friction-stirred welds, such as incomplete continuity of the bond between the material from each side of the weld (referred to as a “kissing-bond”), long tunnel-like defects, and lack-of-penetration. Also, due to the friction-stir welding process, defects can be randomly oriented inside the weld.
Calibration Defects
Longitudinal, transverse, and oblique notches located on the OD and ID are used as references for the calibration process. Side-drilled holes are also employed to build the time-corrected gain (TCG) curve, which will account for signal attenuation inside the material.
VIDEO
Catalogs
Scanners and Accessories
36 Pages
Related Searches
- Tester
- Aeronautical tester
- Inspection system
- Inspection machine for the aeronautical industry
- Portable tester
- Evident analyzer
- Evident aeronautic analyzer
- Surface inspection system
- Evident benchtop analyzer
- Evident aeronautic thickness gauge
- Evident thickness gauge
- NDT inspection system
- Endoscope
- Evident flaw detector
- Evident aeronautic flaw detector
- Coating thickness gauge
- Material analyzer
- Digital tester
- Evident XRF analyzer
- Videoscope
*Prices are pre-tax. They exclude delivery charges and customs duties and do not include additional charges for installation or activation options. Prices are indicative only and may vary by country, with changes to the cost of raw materials and exchange rates.


